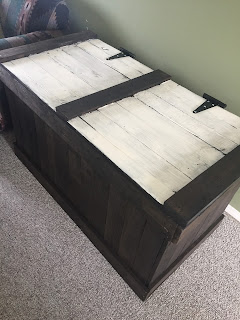
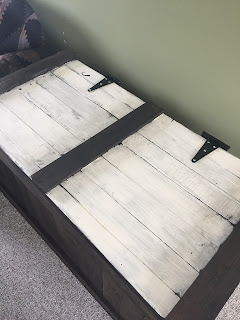
Hey, Everyone! I'm SO sorry it has taken me such a long time to post this project! It's been a very busy few months for me and every time I was just about finished the project, something else would get in the way (like both our cars being stolen, a new job, the flu and pesky bronchitis... *cough*). So here it is, my dream of having a hope chest has finally come true! I've wanted to have one for years but they're either way too expensive or not my taste. After purchasing some recycled pallet wood for a table project that ended up being nixed, we decided to use the wood and have a hand at trying to build our own hope chest. My husband kept warning me that it was going to be huge (I was worried we were making it too small), so I'm fully owning up to the fact that it is massive and not quite what I intended for our apartment. However, it has already proven to be great storage and a great spot for us to display our Christmas tree. 😏 For the sake of time, and because we really had no idea what in the world we were doing, I'm not going to give instructions for how we built the chest. There were a few DIY blogs that we (roughly) followed along to make it, taking ideas from each to build what we were looking for.
This pallet wood has had so many uses! Remember the DIY coffee sign I made and the sign I made with song lyrics on it? There's so many different things to make!
Using pallet wood can be a challenge because sizing varies with each piece. We found it easier to make our base first, using plywood for the bottom and working our way to the top. The last part we made was the lid.
*When working with pallet wood, always make sure to check for splinters and nails... I spent a lot of time sanding it down as the wood was very rough)
I honestly loved the look of the wood with all it's character, it was pretty hard to cover it with stain!
After the chest was built and thoroughly sanded, it was time for my favourite part of any project! I love trying out different wood stains, so I had to take the opportunity to try out Minwax's Jacobean. I love how dark the stain is, yet it shows the character of the wood so nicely! I first tested the inside of the chest and then worked my way outside. Because pallet wood isn't always straight, I made sure to get every corner and edge possible so that there wouldn't be bare spots visible to the eye.
This stain gave the exact look I wanted, rustic and simple.
When we put the chest together, something felt missing. I think because it was all one solid, dark colour and with it being so big, I wanted to break it up a bit. So I used my good old dry brushing technique and pulled out my favourite shade of off -white paint on the lid.
I love the look of this chest! When we first bought hinges (as seen in the photos below), we didn't realize just how big the chest was, so I ended up going back to the store and buying bigger ones.
And here it is! I was hesitant to call it finished at first because I thought I'd like to add rope handles (or some sort of handles to it). In the end, I've decided to keep it simple and keep handles off for now.
This chest was super easy to make and already a piece we've come to rely on in our apartment. The amount of storage it provides is really helpful and it's pretty satisfying to know we made it ourselves. Next time, I'll just make sure to build one *slightly* smaller. 😉


