Tuesday, April 25, 2017

Refinishing a Farmhouse Table


Hey everyone! I'm so excited to share this latest project! A family friend contacted me recently to see if I'd be able to refinish her son's kitchen table. It needed an update and when they told me the look he wanted, I was so excited! This table is the perfect size, at first, I didn't realize that it also has a unique way of storing the leaf underneath it. After some deliberation, they decided to go with Minwax's Classic Grey wood stain for the top of the table, and for the bottom of the pedestal, we went with Rustoleum's White Linen Chalk Paint, the results are stunning! 


The leaf is folded under the table top as you can see in the photo below. 


After I finished sanding the table, the next step was to apply the stain. The photos below show that even though I sanded down to the bare wood, it wasn't absorbing the stain as hoped. It's a great example of what happens occasionally with harder wood, with the stain resting on the top instead of in the wood grain, it wasn't the result we hoped for. 


After some debating, I decided to resand and start again. This time, before applying the stain, I used a wood conditioner to help the wood absorb it evenly. This ended up making the stain absorb into the wood beautifully. 


What a difference! 


After the stain had dried, I applied a satin finished Polyurethane to protect it. This will protect the wood from spilled drinks to hot plates. Next, I applied two coats of the chalk paint to the base of the table. 


And for the final step, I applied a wax finish to the base of the table to protect the finish. 


This kitchen table has undergone a wonderful transformation! I've got two new techniques I'm going to use from now on, with the conditioner and wax, and this will be a great centrepiece for their kitchen. :)


Sunday, February 5, 2017

Red Mahogany Hope Chest


Hey Everyone, I hope you're all doing well! Today's post is about a hope chest I recently bought for all of $8.00! And it was already mostly sanded down too! (Bonus!) I'm completely obsessed with hope chests and since this one was so cheap, I thought it would make a fun project. After a bit of debate, I decided to stain it with Minwax's Red Mahogany. I have so much in my inventory right now, that I figured it would be smart to use what I already have. This project was so easy to do because the hard part, sanding, was already basically done for me! I left the inside the original colour and finish, a kind of pearly grey/pink, so I just went over the outside with my sander once. 


I love the simple shape of the chest, nothing ornate, which is how I like it! I wasn't too sure where I wanted to put the chest, but I've now found a great spot for it in our living room, providing lots of storage.


After staining the lid, I was unsure about the colour. This photo doesn't do it justice, as there were a lot more red undertones. After it dried, it looked exactly how I desired!


Since some of the stain inevitably ended up on the inside of the chest, I ended up taking a rag with some paint thinner and it came off easily. This is because the inside was stained and had a protective clear coat on it, so the stain wasn't seeping into the wood. 


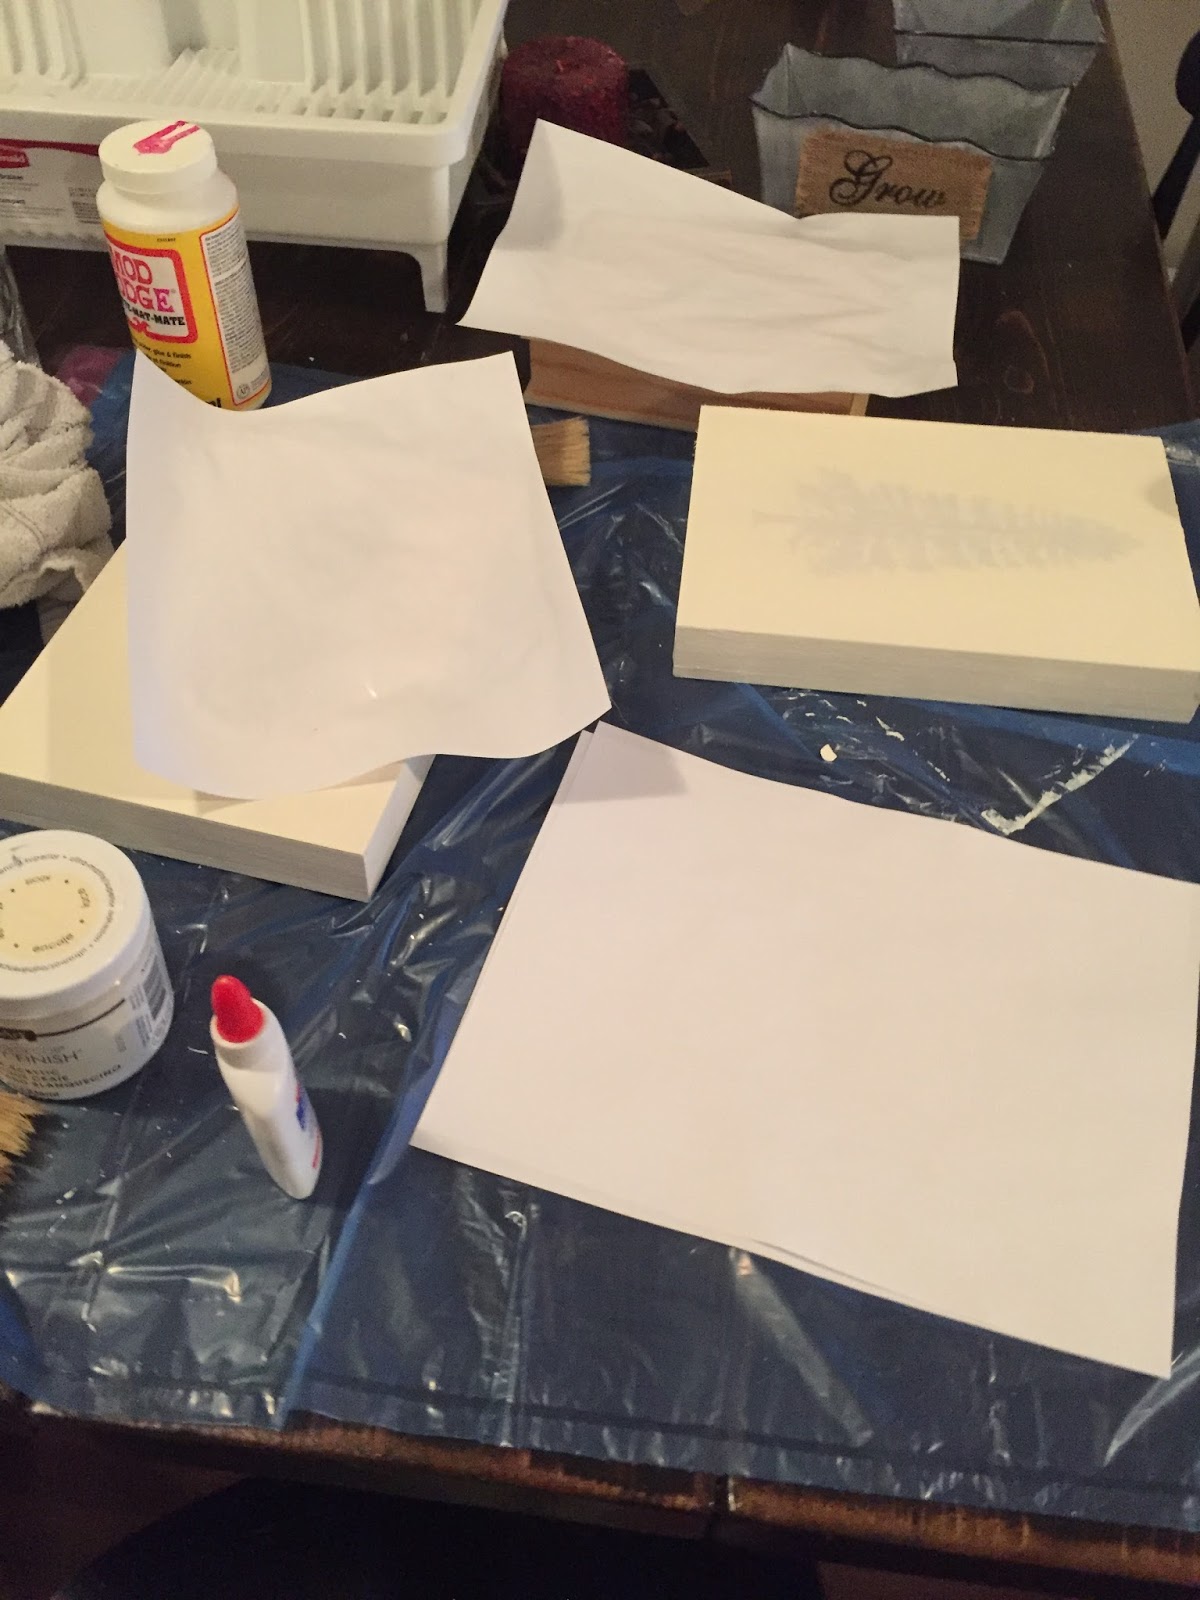
After the stain had cured, I decided I wanted to do an image transfer of a black and white forest onto the lid of the chest. I have done image transfers before but thought I'd try some new ways to see if there would be easier methods. The results were not what I hoped for! I first used Mod Podge and an inkjet printed image, which ended up smearing the ink.


It turned out okay, looking like an old photograph, but lots of the image was missing.


For my next attempt, I tried using another inkjet image along with Elmer's glue and Mod Podge. The results were even worse than my first attempt! 


Finally, I tried using a laser printed image and Mod Podge, first with an image on the underside of the lid. I wasn't too happy with how much of the image was missing. I decided to try again with the forest image on the lid, this time waiting a full 24 hours for it to dry. I was much happier with the results. 


Finally, a much better image! Next time, I will probably purchase more image transfer medium because I know that it's a tried and true method. I really wanted the grain of the wood to still show through this image, which did happen. :) 


Tadaaaa! We put the hinges on and it looks perfect! Not bad for a project that costed me around $15 to do! 


Thursday, December 1, 2016

Pallet Hope Chest


Hey, Everyone! I'm SO sorry it has taken me such a long time to post this project! It's been a very busy few months for me and every time I was just about finished the project, something else would get in the way (like both our cars being stolen, a new job, the flu and pesky bronchitis... *cough*). So here it is, my dream of having a hope chest has finally come true! I've wanted to have one for years but they're either way too expensive or not my taste. After purchasing some recycled pallet wood for a table project that ended up being nixed, we decided to use the wood and have a hand at trying to build our own hope chest. My husband kept warning me that it was going to be huge (I was worried we were making it too small), so I'm fully owning up to the fact that it is massive and not quite what I intended for our apartment. However, it has already proven to be great storage and a great spot for us to display our Christmas tree. 😏 For the sake of time, and because we really had no idea what in the world we were doing, I'm not going to give instructions for how we built the chest. There were a few DIY blogs that we (roughly) followed along to make it, taking ideas from each to build what we were looking for. 


This pallet wood has had so many uses! Remember the DIY coffee sign I made and the sign I made with song lyrics on it? There's so many different things to make! 


Using pallet wood can be a challenge because sizing varies with each piece. We found it easier to make our base first,  using plywood for the bottom and working our way to the top. The last part we made was the lid. 
*When working with pallet wood, always make sure to check for splinters and nails... I spent a lot of time sanding it down as the wood was very rough)


I honestly loved the look of the wood with all it's character, it was pretty hard to cover it with stain!


After the chest was built and thoroughly sanded, it was time for my favourite part of any project! I love trying out different wood stains, so I had to take the opportunity to try out Minwax's Jacobean. I love how dark the stain is, yet it shows the character of the wood so nicely! I first tested the inside of the chest and then worked my way outside. Because pallet wood isn't always straight, I made sure to get every corner and edge possible so that there wouldn't be bare spots visible to the eye. 


This stain gave the exact look I wanted, rustic and simple. 


When we put the chest together, something felt missing. I think because it was all one solid, dark colour and with it being so big, I wanted to break it up a bit. So I used my good old dry brushing technique and pulled out my favourite shade of off -white paint on the lid. 


I love the look of this chest! When we first bought hinges (as seen in the photos below), we didn't realize just how big the chest was, so I ended up going back to the store and buying bigger ones. 


And here it is! I was hesitant to call it finished at first because I thought I'd like to add rope handles (or some sort of handles to it). In the end, I've decided to keep it simple and keep handles off for now. 


This chest was super easy to make and already a piece we've come to rely on in our apartment. The amount of storage it provides is really helpful and it's pretty satisfying to know we made it ourselves. Next time, I'll just make sure to build one *slightly* smaller. 😉