Monday, October 22, 2012

The Perfect Gift

My sister's birthday is in the begining of October and as I overheard her mentioning that she wanted a new jewellery box, I let the creative ideas start coming. I bought a basic wood jewellery box from Michael's crafts store and painted it black. After multiple coats of paint, some sanding (and a few dents from a hammer to give it that "lived in" look), I had to change a few things. Originally, the box came with a clear glass lid, which I had to remove for painting. Unfortunately (and oh- so typically), the glass shattered when I began to place it back for completion. With only one more day until my sister's birthday, I came up with an idea: why not use some chicken wire, burlap and cork board backing to replace the glass? Here's how it turned out:


That Little Black Box

If I ever run out of a paint colour first, it's usually black. I love to use basic black paint to give character to any project. Here's a small showcase of some of the jewellery boxes and house decorations I've made using some good old black paint:

This tiny box holds some of my favorite things:


This box isn't quite finished yet, but I love its simplicity. I will probably show this box completed in a future post: 


This next one makes a great peice for home decoration. I love how classic and charming black paint can be when used with a little creativity. :)


Sunday, October 21, 2012

From Dark Stain to Light

 Today I'm going to post some photos of a dresser I recently refinished for some family. I got to sand it to the bone and restain it a light beige colour. After sanding this dresser down, I used some water-based woodstain to match their bedroom furniture. 
 

Before:
  
 
After sanding:


Staining:


And now a light beige stain to match their bedroom set:


Hello everyone,

Today I thought I would show you some of my smaller projects, perfect for gifts and little household decorations. Inspired by a rustic country design, I love to paint and distress small boxes, making them perfect for jewellery and little trinkets. Using small boxes also is a great way to practise new techniques and paint colours! Here's just a few small projects I've recently done:


Here's the box I used as a sample for the two night stands from one of my previous posts.


This is my first attempt at wood burning:

 
I decided to try a new shade of paint called Copenhagen Blue. It turned out a bit brighter than I had wanted, but still makes for a cute trinket box.


Tuesday, August 28, 2012

Hello everyone, today I've decided to showcase a few photos of some previous bedroom furniture I've refinished. They all match my vintage white dresser from a previous post. Hope you enjoy!


Wednesday, August 22, 2012

Hello all,

Today is a great day to show off my favorite project that I've done so far. These two lovely night tables belonged with the dresser I posted photos of yesterday. I decided to give them a modern farmhouse look, using flat black paint.


After sanding these two down, I used a few coats of flat black paint (with built in primer).  I distressed them using 80 grit sand paper and gave them a protective coating of semi-gloss varathane.


Tuesday, August 21, 2012

Welcome to my blog,


I've recently taken in a new hobby: refinishing old furniture. It's quickly become a passion of mine, starting out as a small undertaking for my bedroom, but quickly turning into a career dream. I love looking at a beat up, old piece of funiture and envisioning what it will turn out to be once I've put some time into it. I'm always learning new techniques, new ways to quicken the process, and apparently, new ways to make a mess. I hope you enjoy a few of my latest projects, a few out-dated pieces in need of some TLC.


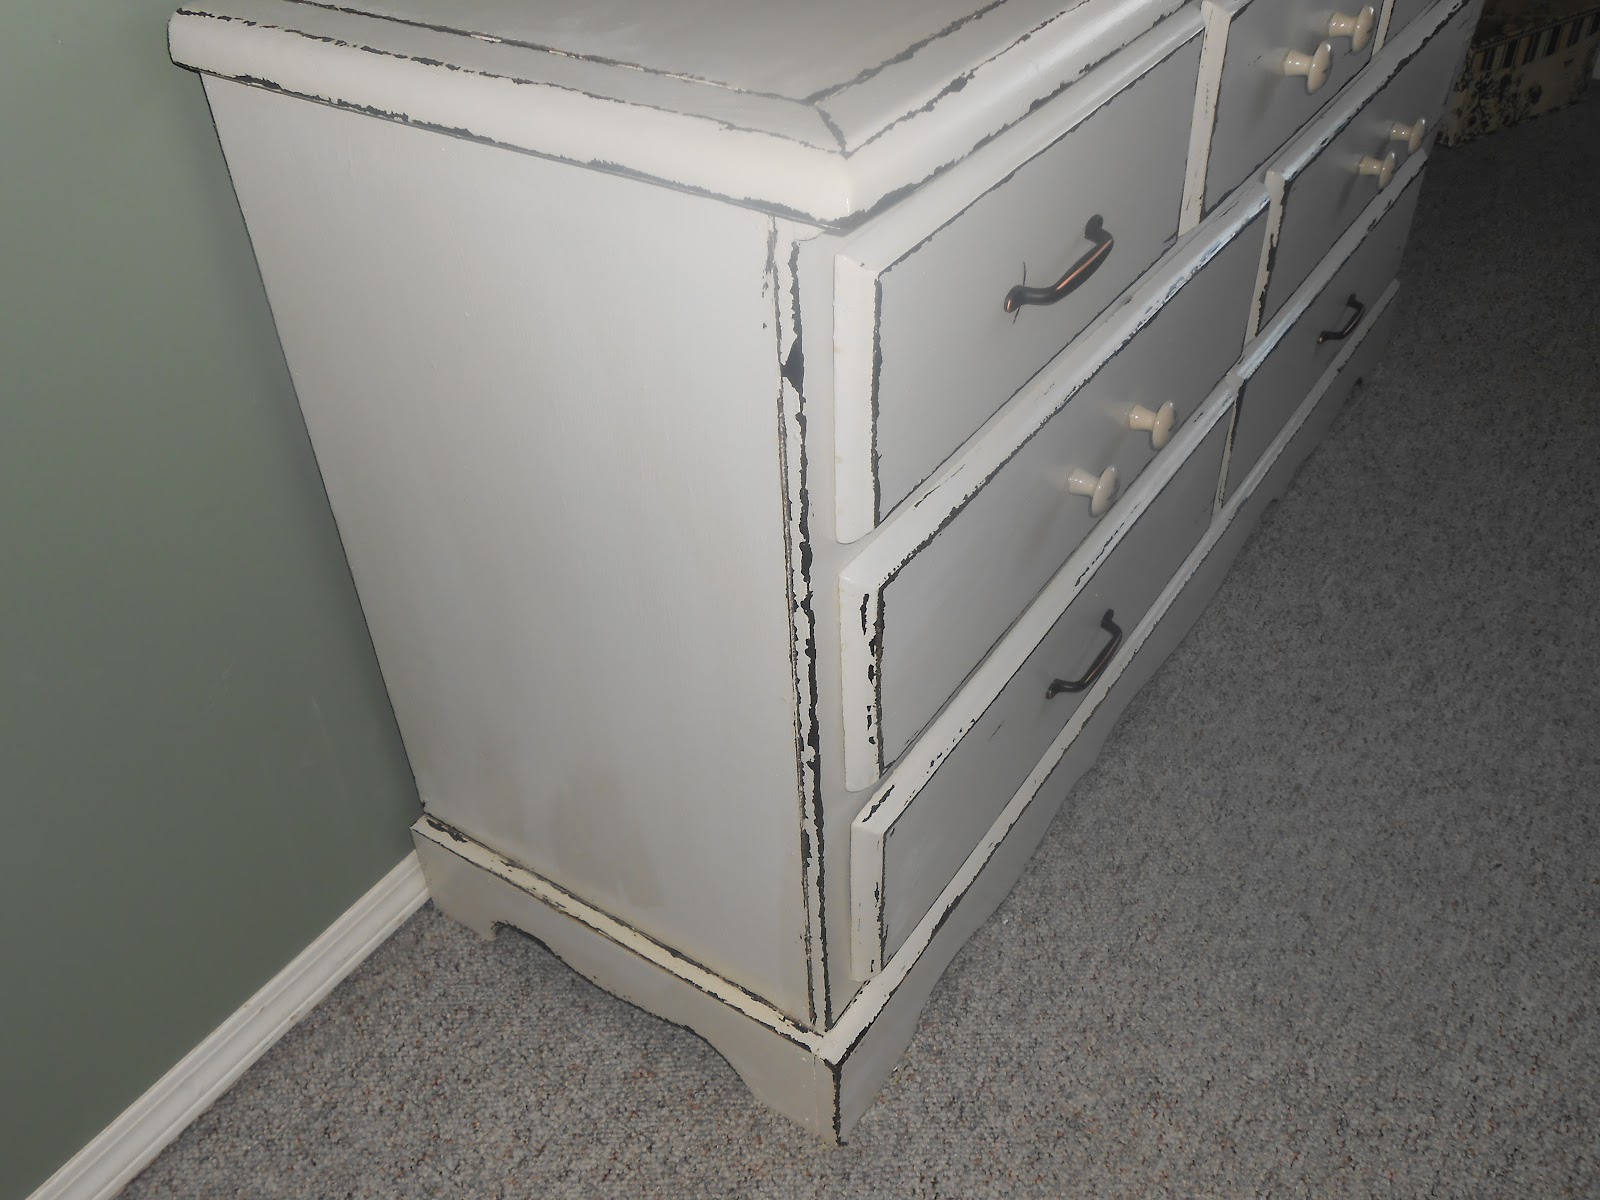
This is one of my recent projects, a dresser that I've given a rustic, vintage look. First, I sanded it down, then stained it a dark chocolate brown colour. I used a tinted white primer, and then came the fun part: distressing it! Using screwdrivers and other random tools (such as a hammer, a pocket knife and some sand paper), I distressed the edging along the dresser to let the chocolate brown stain appear. After putting on a few coats of semi-gloss varathane, this project was almost complete. I needed to replace the very out dated handles on the dresser, so I used four black (distressed) handles and six patterned drawer knobs to do the trick. :) And last but not least, I added this lovely quote at the dresser's focal point. With an extra coat of varathane to seal the deal, this dresser has a lot of vintage charm.


Here are a few more photos: