Thursday, November 26, 2015

It's Christmas Time :)


Hey, Everyone! I don't know about you, but I'm feeling ready for Christmas! And of course, ready to try making some new decorations! I found this idea on Pinterest, using pulled apart cloths pins, paint and decorative stickers. It is very easy to do! I first pulled apart a TON of cloths pins and used a hot glue gun to glue the ends together and then connect the "legs" of the stars in the middle. After making the first few, I got creative and tried a few different ideas. It's so easy to make and can look amazing with the right paint colours. You can even stain them, but I decided not to, because I didn't want to wait so long for them to dry.


In the photo below, is one of my creative attempts at making a tree topper! 


After some deliberation, I decided to spray paint the ornaments using Krylon's Gold Spray Paint, and Krylon's Burgundy Red Spray Paint. (I chose the burgundy, as opposed to using bright red because I like more of a country/vintage feel.... and the regular red was just a bit too bright for my taste!)


After visiting the Dollarama, I found a bunch of adhesive mini decorations. They were perfect to place in the middle of the stars and add some subtle colour to them too. 


If you want to add ribbon to hang the ornaments with, you can easily hot glue the ribbon between the cloths pins for the top "leg" of the stars... or you can drill a hole and tie them too! These stars are perfect for just setting them in the branches of your christmas tree if you don't like hanging ornaments... makes for easier clean up!


Thursday, November 5, 2015

Refinishing A Filing Cabinet and a Shelf


Hey, Everyone! I've finally had some free time to refinish a couple of items that I've been waiting a long time to do! This shelf is from one of my clients who was not very happy with the dark colour. We decided to use Debie's Design Diary DIY Chalk Paint in Faded Burlap. 

                  Holly's Homestead Is Now On Facebook! Feel Free to "Like" Us :) 


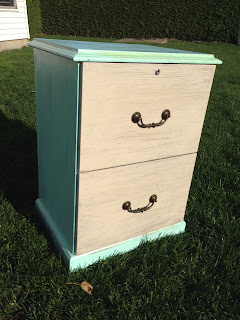
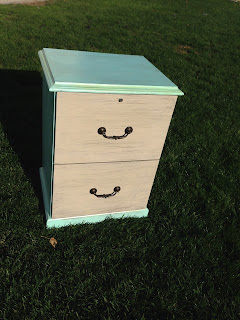
Below, is the filing cabinet that I've had for a couple of years and could never decide what to do with it. Since I keep it in our office area, I wanted it to have a pop of colour to brighten up the space. I decided to use the DIY paint in Faded Burlap on the drawers and Heirloom Tradition's Chalk Paint in Aqueduct. 


The filing cabinet turned out great, except when I put a coat of Varathane on to protect it, the clear coating looked brassy in some areas. I touched it up with more of the Aqueduct coloured paint and am very satisfied with how it turned out. 


In the photo below, the shelf ended up looking very distressed after using my brushing technique. I was concerned that it looked too distressed and needed another coat of Faded Burlap, but my client loved it!


Here it is all set up with the baskets inside.


The photo below shows the top of the shelf and the distressed look up close. 


... And some final photos of the filing cabinet after adding the last coat of Varathane. 


I'm glad to have these two projects completed and very glad that my client loves her shelf! I am happy with the filing cabinet, it will add a nice contrast to the neutral colours in my spare room/office! Thanks for taking the time to check out my blog. :)