Tuesday, October 6, 2015

Refinishing IKEA Rekarne Side Tables


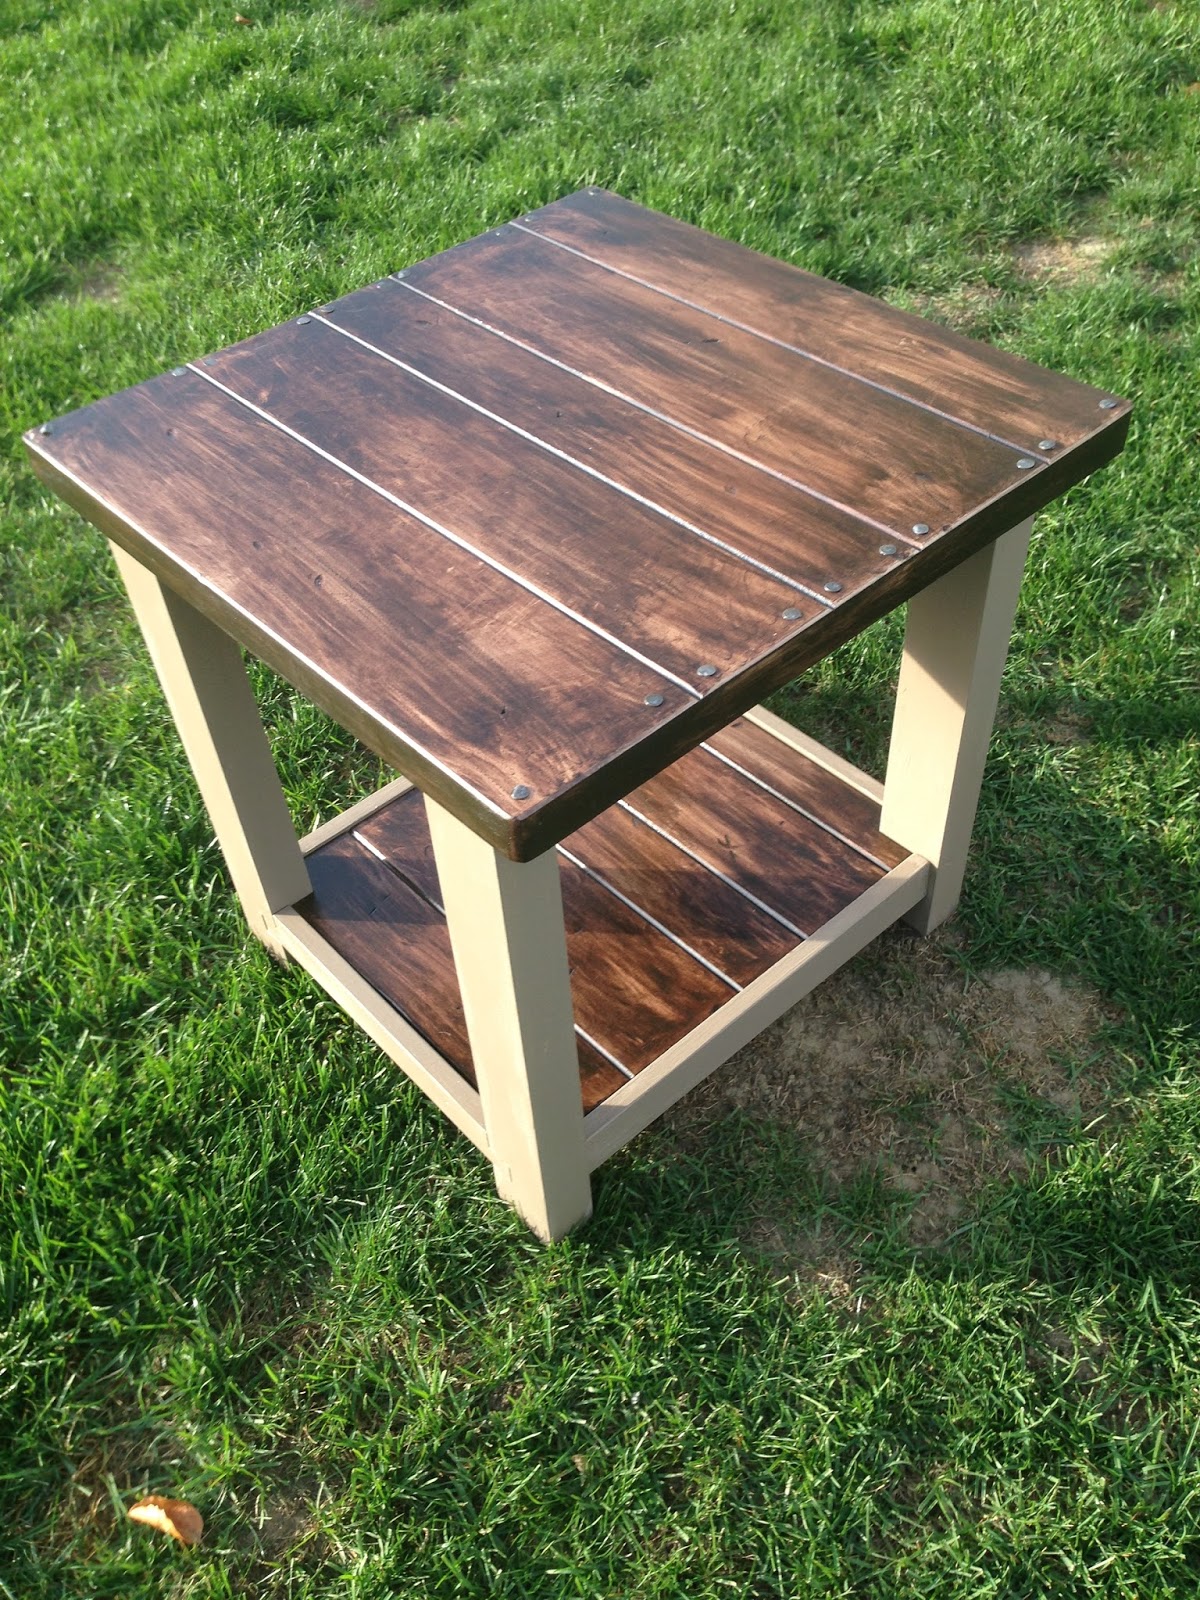
Hey, Everyone! I am so excited to show you my latest project! A few weeks ago, I went to Ikea for the first time and instantly fell in love with their solid pine Rekarne side tables. They were such a good price and ready for refinishing, that it was easy to convince my husband to get them! This project took some trial and error with paint and stain colours, but turned out exactly as I imagined in the end! Below, is what the Rekarne table looks like assembled before refinishing.

After a bit of debating, I decided to try a new wood stain that I haven't used before. Varathane has a new line of wood stain and I instantly loved their dark chocolate colour, Kona. This is an oil based stain that really brings out the grain in the wood. Below, is the photo of my test piece on the underside of the table. 


After sanding all of the pieces of the side table, I spent some time making dents all over everything with my hammer. I wanted the side tables to look very rustic and to already show wear so that I wouldn't have to worry about dents and scratches over time. Next, I brushed on the stain. To my dismay, the stain wasn't working like it had on the test piece. I should have spent more time sanding everything down beforehand. However, my brother had the idea to take a rag and gently rub off parts of the stain to make it lighter. The idea worked perfectly! 


This next step might not technically be an error, but I used some off white paint that I made by mixing my very bright white paint with brown acrylic paint from the dollar store. The paint turned out great, but after I painted over the parts of the side table that would be the legs, I wasn't very happy with the colour. I thought it was too bright and a bit boring, to be honest. So, I went shopping and bought some Debi's Design Diary DIY Paint in Prairie Grey. This chalk paint is awesome and comes in a lot of beautiful colours and options! 


In the photos above, you can see the white paint was still quite bright. In the photos below, the pieces got repainted in Prairie Grey.


After the wood stain was dried and I was satisfied with how the table tops looked, I decided to make them even more rustic by adding some old nails on the sides. This gives a lot of character to the tables. 


After the nails were in, I brushed on three coats of Polyurethane, an oil- based clear sealer to protect the wood. 


After a lot of playing around and testing different colours and techniques, these Rekarne side tables turned out to be exactly as I had hoped! They make such a great addition to my living room! 


:) 

Wednesday, September 23, 2015

Old Milk Cans Get a New Look

Hey, Everyone! I've been on quite a roll lately, with lots of projects and so little time to do them! My family has had these old milk cans for as long as I can remember. After doing some landscaping, my parents asked me to add some life to these milk cans to put in front of the house. The only problem was after I had refinished the milk cans, they look so good that my parents are worried someone might steal them! Now they're a new addition to the fenced in backyard. :) This was quite a new experience for me, as I don't have a lot of practise working with metal! The cans were already rusted out, so I attached a sanding head to a drill and sanded the chips of paint and rust off.

 These are the cans after sanding, bits of paint and rust came off, but most of it still stuck on. I made sure to get a very good rust proof and weather proof paint that would adhere strongly to the metal.

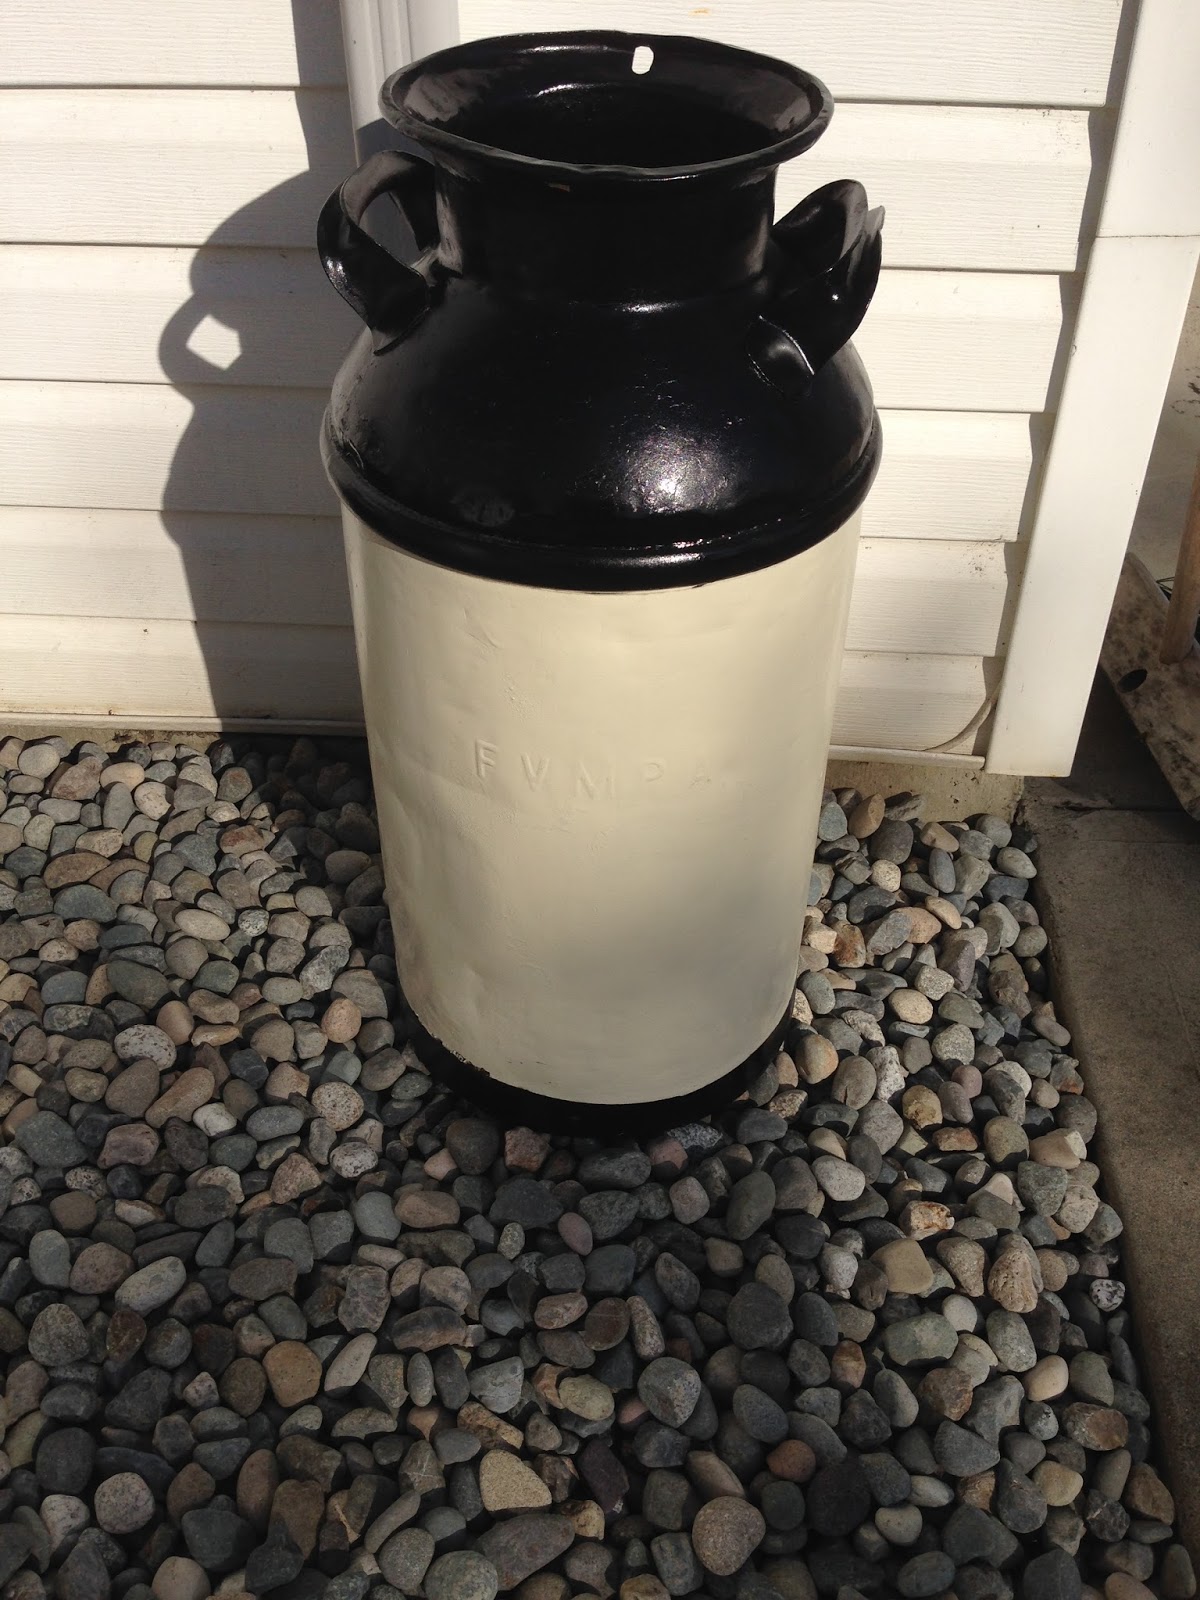
 We decided to go with a glossy off white paint colour for the middle of the milk cans and a glossy black paint colour for the bottom rings and the tops of the cans. After a bit of deliberation, I went with Tremclad's spray paints as they are a trustworthy brand and had exactly what I needed to make sure they can withstand the weather. 

 After doing a few coats of the off white paint, we let it dry. Once it was thoroughly dry, we taped newspaper over top to prevent any black paint from being sprayed onto it.


 And here we have the unveiled milk cans, looking beautiful and ready for decoration! The last thing we needed to do was to put on Tremclad's clear gloss spray as another layer of protection. 


Wow! Even looking at these photos I just can't believe what a difference some good paint can make! These paint cans will be beautiful accessories to the backyard and will be able to withstand the winter weather to come! 

Home Made Wood Stain and Photo Transfers (Part 2)

Hey, Everyone! As promised in my earlier post, (Home Made Wood Stain and Photo Transfers (Part1), I will show you how I managed to figure out why the homemade wood stain kept turning a rusty brown colour. After testing different black teas to determine which would leave the most tannins in the wood, I went with Tetley Tea's Orange Pekoe. In the image below, I first used the original tea I had started out with, Twinning's Breakfast Tea. Then I brushed the steel wool/vinegar solution on top. The results were the rusty brown colour on the right side of the photo. Then, I used the Tetley tea, which was clearly darker and then brushed the steel wool/vinegar solution and it turned out beautifully, as you can see on the left side of the wood plank. 

 Since it turned out so nicely, I decided to test it on a few pieces of wood to be sure that I had solved the issue. 
 After painting the plank with an off-white acrylic paint, it was ready for the photo transfer. Below, is the final product, one of my sister's wedding photos. 

 And after adding some wire to the back, it's all ready to be hung on the wall! 
 To give you more of an idea of the variances you can get with homemade wood stain, I did this test piece below. At the top, is the wood with a few coats of black tea on it's own. It turned the wood into a beautiful weathered grey. To get this look, I used very little water, with lots of tea to have more tannins. In the middle, I did one layer of the black tea, let it dry, and then I added one layer of the steel wool/vinegar solution. After it dried, I added on many layers of the black tea, and I think it looks gorgeous! And on the very bottom, I did the black tea, then one layer of steel wool/vinegar solution and then only a couple of layers of the black tea, so it would be lighter than the one above. There are so many varying looks that this home made wood stain can do, so be careful to remember how you did it the first time so you can get the same results again. 
*The wood I use in the photo above for my test piece is pine :) 

Friday, September 4, 2015

Home Made Wood Stain and Photo Transfers (Part 1)

Hey, Everyone! I am so excited to show you a couple new skills I have recently acquired! After seeing quite a few posts on Pinterest, I decided to give these two a try! I saw some beautiful examples of how to transfer photo images onto wood and a blog about how to make your own wood stain using steel wool and vinegar. The results of the wood stain didn't turn out quite how I had wanted, but in Part 2, I will show you how I ended up getting it perfect! To combine the two new skills, I decided to stain some wood with the steel wool/vinegar mix and then added some Annie Sloan Old White Chalk Paint on top, then I transferred the images (some of my wedding photos) onto the wood. 

To start, I took a mason jar and used 000 grade steel wool pulled apart with approximately two cups of white vinegar. I left it to sit for 24 hours, this is how it looked. Then, I used lukewarm water and some black tea (it must be black tea for it to work properly, the tannins in the tea bring out the wood stain). First, you want to just take the tea and brush it all over the wood and let it dry. Then, brush the steel wool/vinegar concoction and it will begin to stain the wood.


In the image above, this is how the wood looked after brushing the tea on it. It didn't change the wood colour, but as you can see below, after brushing the stain mix on, it changed very quickly!

As it turned out, I realized the stain was more of a rust/brown colour than the weathered gray colour I desired and had seen on the website. I later discovered that I wasn't using a strong enough tea. I ended up trying it again, but with Tetley Orange Pekoe caffeinated tea, and it turned out exactly how I had hoped! The results from my second try can be found in Part 2.


After the stain had dried, I brushed on some of the Annie Sloan Old White Chalk Paint and gave it a distressed look.

Now for the image transfer: To transfer an image onto wood, it must be printed onto regular white paper by a laser printer. I "flipped" the image so that it would turn out the right way when placed face down. This is especially crucial if you have any kind of words or numbers on the image, or else they will look backwards! Then I took some Artist's Loft gel medium in a gloss finish and brushed quite a good amount directly onto the image. Then, very carefully, I placed the image down and smoothed it out using an old gift card to get the air bubbles out. It is crucial to make sure it gets placed properly the first time, as it can ruin the image to lift it off the wood and try to move it. 
After waiting overnight to ensure that all of the gel medium had dried, I placed a damp cloth over the image for about 2-3 minutes and then rubbed off the paper very gently until the image showed through and there were no more pieces of paper left. 
In the image above, I have the Artist's Loft Gel Medium bottle to the left, and on the right is the Mod Podge used after the image is done to keep it sealed.
The results were amazing! This ended up being a very fun and beautiful project! After making a couple of changes, the wood stain worked out beautifully and the image transfer was fun and it was so exciting to see the images looking so professional and ready to be hung up!