Wednesday, June 22, 2016


Hey Everyone! I am so excited to share with you another scrap pallet wood project! I've been getting a lot of inspiration on Pinterest to try some different techniques for making signs and I came across this blog post:http://realitydaydream.com/how-to-make-your-own-barn-boards-diy/. The idea of using  random paint colours and stain really appealed to me, I also wanted to have a beachy look! The process was pretty simple: After gluing the boards for the sign together, I painted each board a different colour, then mixed some of the paint colours on it, sanded it lightly after everything had dried and then rubbed some of Minwax's Provincial wood stain to show off the wood grain. 

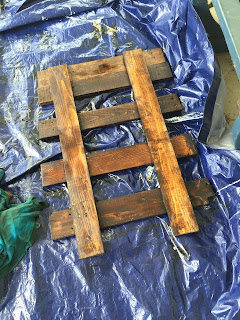
Here's the wood before painting, I love how rustic the wood already was, so much character!


The process for painting the wood was very easy, you can basically just slap it on and try mixing colours, there's no wrong way to do it! I ended up using dark grey, navy blue, succulent (greenish) and off-white paint. 


After the paint dried, I roughly sanded the wood down so the grain would show through. Next, I took a cloth and rubbed the wood stain on top to make it stand out. I love Minwax's Provincial stain because it's not too dark and not too light. Once everything was dry, I chose some lyrics from Hillsong's Touch the Sky and cut out the stencils for the wording. I decided to use the off-white paint for the lettering so that it would stand out more than black. 


The following photos were taken by my dear friend, Sarah-Ann. She's so talented and really brings out the details in her photos! Thanks again, Annie! :) 


Don't forget to check us out on Facebook at: https://www.facebook.com/hollyshomestead/

Tuesday, June 21, 2016

DIY Coffee Sign


Hey, Everyone! I'm so excited to show you what I've made using scrap pallet wood! On Pinterest I've been seeing all kinds of inspiration for my coffee bar, one way to save more cupboard space is to make a sign with hooks to hang mugs. I happened to get inspired when I found some leftover cuts of pallet wood and made a small ladder. Why not use it to either hang up on the wall or lean it against the wall to hang all our coffee mugs? :) After arranging it as desired, I roughly sanded it down to get any splinters off and glued the pieces together.


After allowing the glue 24 hours to dry, I decided to try a different shade of stain. I went with Minwax's Provincial stain, a perfect red/brown shade that's not too dark and not too light. 


After the stain was dry, I cut out and arranged my letters for stencils and decided to paint the lettering white so that it would stand out against the stain. I also ordered some hooks online and made sure they were placed evenly apart. 


The following photos were taken by my amazing friend, Sarah-Ann. She's a talented photographer and has captured the details in my pieces way better than I ever could! Thanks again, Annie! :) 


This project turned out so much better than I had ever imagined! I never thought that scrap pallet wood could look so good, and have such a practical use too!

Feel free to "like" our Facebook page at: 

Friday, May 27, 2016

Beach Cottage Feel


Hey, Everyone! I am so excited to share my latest project with you! I was recently contacted by a client who wanted her bedroom furniture updated. She wanted a "beach-cottage" feel and for it to be painted with chalk paint. Chalk paint is fantastic because of its durability and how easily it can adhere to wood without need any sanding or priming. One of my favourite stores, Spruce Collective, recently debuted their new line of chalk paints called, "Shelter by Spruce Collective." Originally, we were going to go with their light green colour called Beach Glass. It looked amazing, but when we went to the store, we realized it was more green than what we were looking for, so we went with Succulent. Succulent is a gorgeous blue/grey toned paint, it was just perfect for our beach look. What really amazed was the coverage this paint has... it only took one coat of paint to achieve our look (which is usually unheard of!) and after refinishing two dressers, two night stands and a table, we only used half of a can! I'm incredibly impressed with the quality and how far this paint goes! 


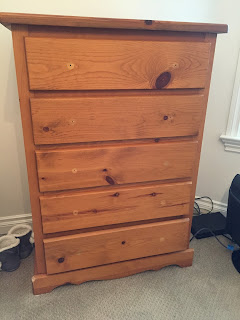
 Here are all the "before" photos of the dressers and night stands. After laying a tarp down and setting everything up, it was time to test the paint. 


I used a dry brushing technique on the furniture to create a naturally distressed look. This paint was nice and thick, so only one coat was needed. This project took hardly any time and dried so quickly. Because the paint is so durable, it passed all of my tests so I ended up leaving it without any protective coating. 


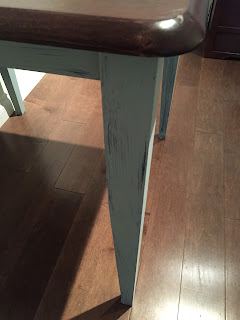
Since we used just barely half of the paint can, my client had a table she was hoping to turn into a desk so I suggested that I paint the base to give it more character. The results were fantastic! :) 


I absolutely can't say enough good things about this chalk paint! The quality is amazing and the colour ended up being the absolute perfect fit. It creates a tranquil look, cozy and calming and completely changes the look of the whole room! It's always such a great feeling to see a happy client and to know you've helped make a transformation that will last for years to come. :) 


Feel free to "like" our Facebook Page at: http://www.facebook.com/hollyshomestead