Thursday, October 29, 2015

Dining Table Redo


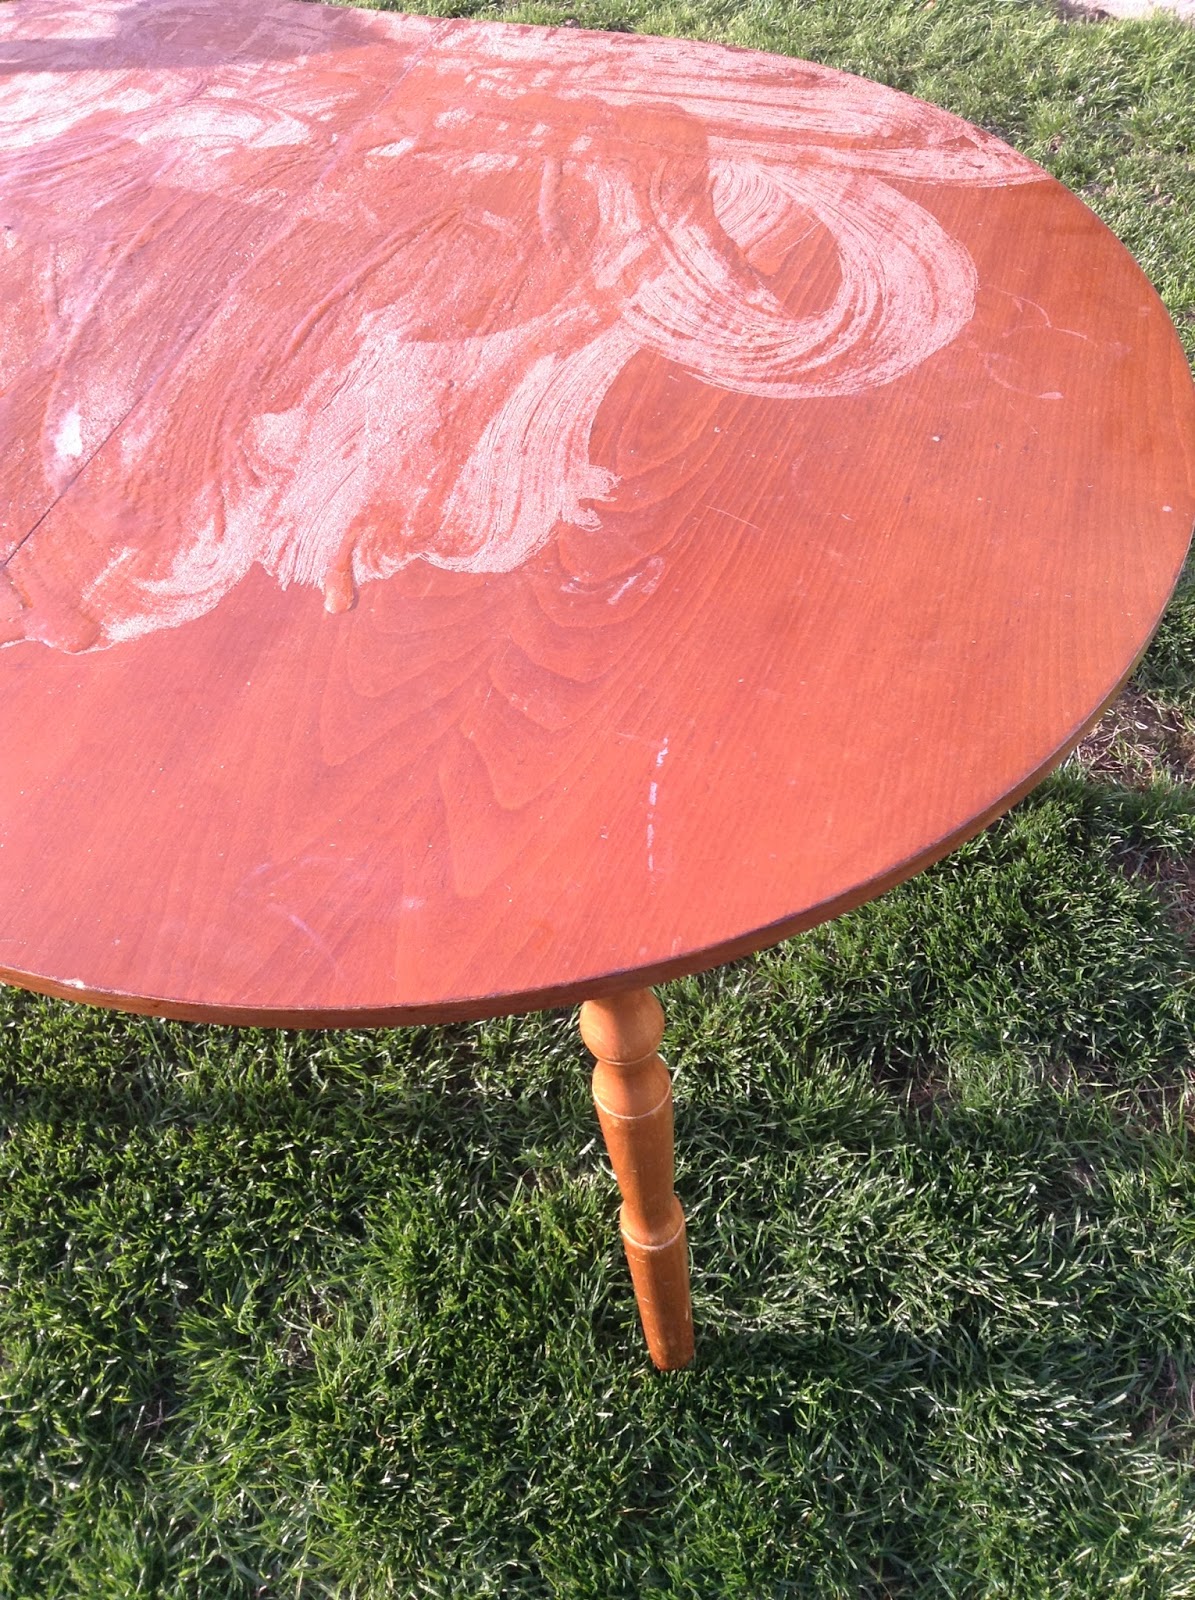
Hey, Everyone! I just recently had one of the most frustrating projects yet! Thankfully, it turned out great, but it took a lot of patience getting there. This table is around thirty years old and long overdue for a makeover. The red stain on it was very difficult to remove, so I used a lot of wood stripping solution and spent a lot of time using the sander to get the wood bare and ready for my home made vinegar wood stain solution. 


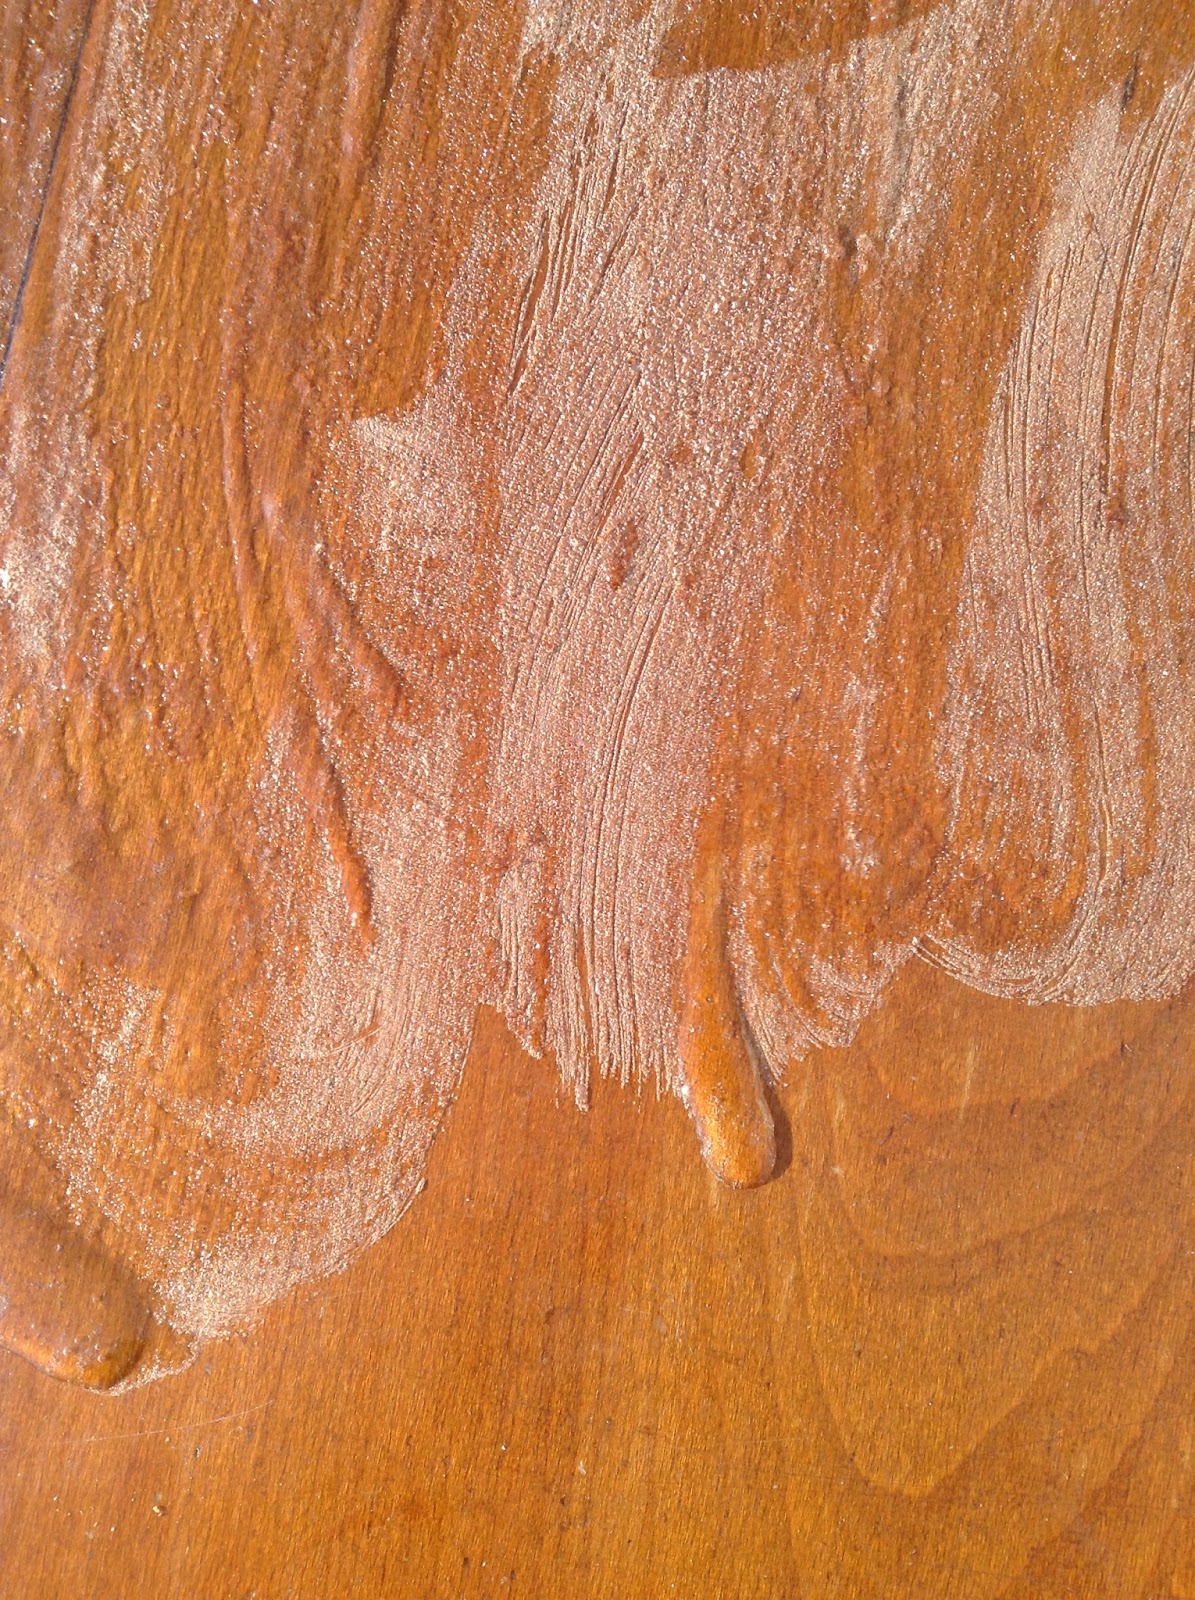
 This table's bright red stain needed to go, so our first step was to apply wood stripping solution. In the photo below, you can see how the solution causes the stain to bubble up. 


After scraping off the stain and using a sander, the table's wood was finally bare. In my previous post, I mentioned my latest attempt at making my own wood stain using steel wool and vinegar. I decided to use the same solution to stain the top of this table. First, I did three coats of black tea over the wood for the stain to mix with the tannins and make a beautiful grey colour, in the photo below. 


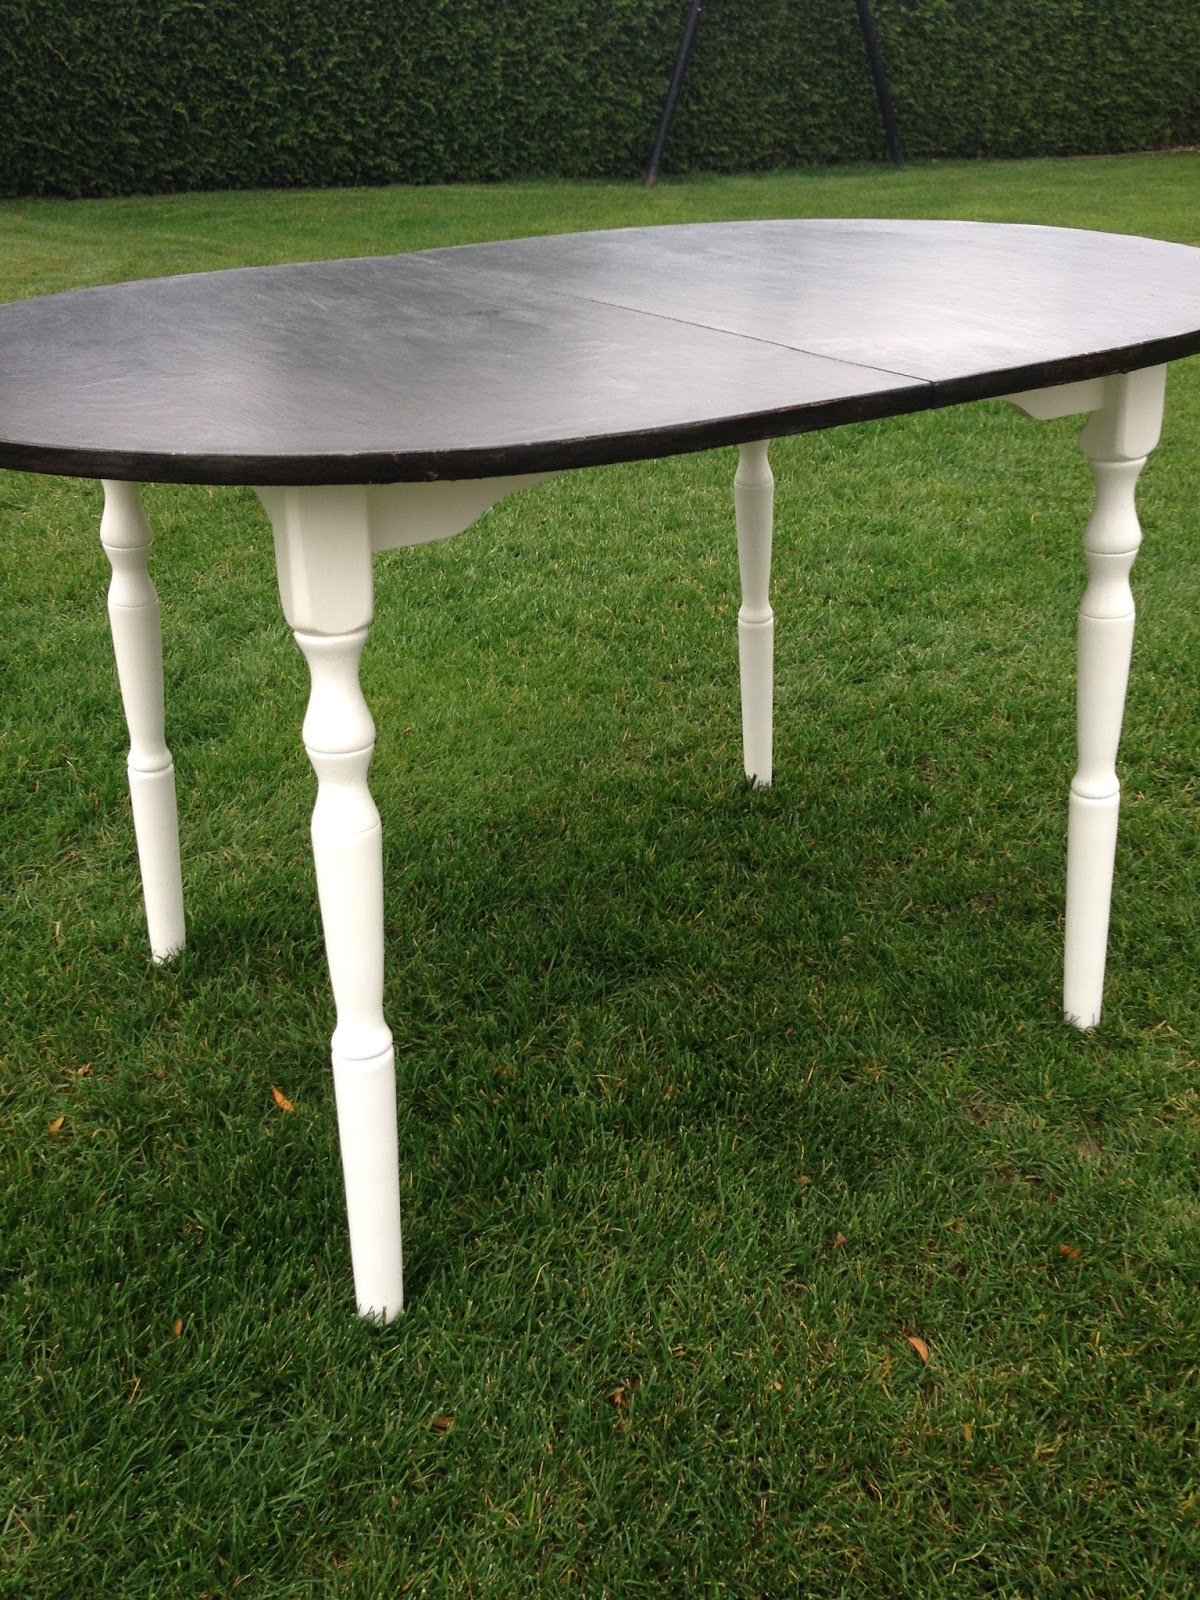
 After the stain was dry, I used an oil based polyurethane to protect the table top. I wanted to use a very strong poly to protect from scratches and hot plates of food. The only down side to using the poly was that it made the stain look much darker than I had hoped for. 


And after a few coats of polyurethane, it was time to tackle the legs. I used acrylic white paint, some that I had mixed together myself to create the right shade I wanted. This made the table look a lot more elegant! 


And there we have it! A lovely table that's been given a new look to add to the collection! :) 


Tuesday, October 6, 2015

Refinishing IKEA Rekarne Side Tables


Hey, Everyone! I am so excited to show you my latest project! A few weeks ago, I went to Ikea for the first time and instantly fell in love with their solid pine Rekarne side tables. They were such a good price and ready for refinishing, that it was easy to convince my husband to get them! This project took some trial and error with paint and stain colours, but turned out exactly as I imagined in the end! Below, is what the Rekarne table looks like assembled before refinishing.

After a bit of debating, I decided to try a new wood stain that I haven't used before. Varathane has a new line of wood stain and I instantly loved their dark chocolate colour, Kona. This is an oil based stain that really brings out the grain in the wood. Below, is the photo of my test piece on the underside of the table. 


After sanding all of the pieces of the side table, I spent some time making dents all over everything with my hammer. I wanted the side tables to look very rustic and to already show wear so that I wouldn't have to worry about dents and scratches over time. Next, I brushed on the stain. To my dismay, the stain wasn't working like it had on the test piece. I should have spent more time sanding everything down beforehand. However, my brother had the idea to take a rag and gently rub off parts of the stain to make it lighter. The idea worked perfectly! 


This next step might not technically be an error, but I used some off white paint that I made by mixing my very bright white paint with brown acrylic paint from the dollar store. The paint turned out great, but after I painted over the parts of the side table that would be the legs, I wasn't very happy with the colour. I thought it was too bright and a bit boring, to be honest. So, I went shopping and bought some Debi's Design Diary DIY Paint in Prairie Grey. This chalk paint is awesome and comes in a lot of beautiful colours and options! 


In the photos above, you can see the white paint was still quite bright. In the photos below, the pieces got repainted in Prairie Grey.


After the wood stain was dried and I was satisfied with how the table tops looked, I decided to make them even more rustic by adding some old nails on the sides. This gives a lot of character to the tables. 


After the nails were in, I brushed on three coats of Polyurethane, an oil- based clear sealer to protect the wood. 


After a lot of playing around and testing different colours and techniques, these Rekarne side tables turned out to be exactly as I had hoped! They make such a great addition to my living room! 


:)