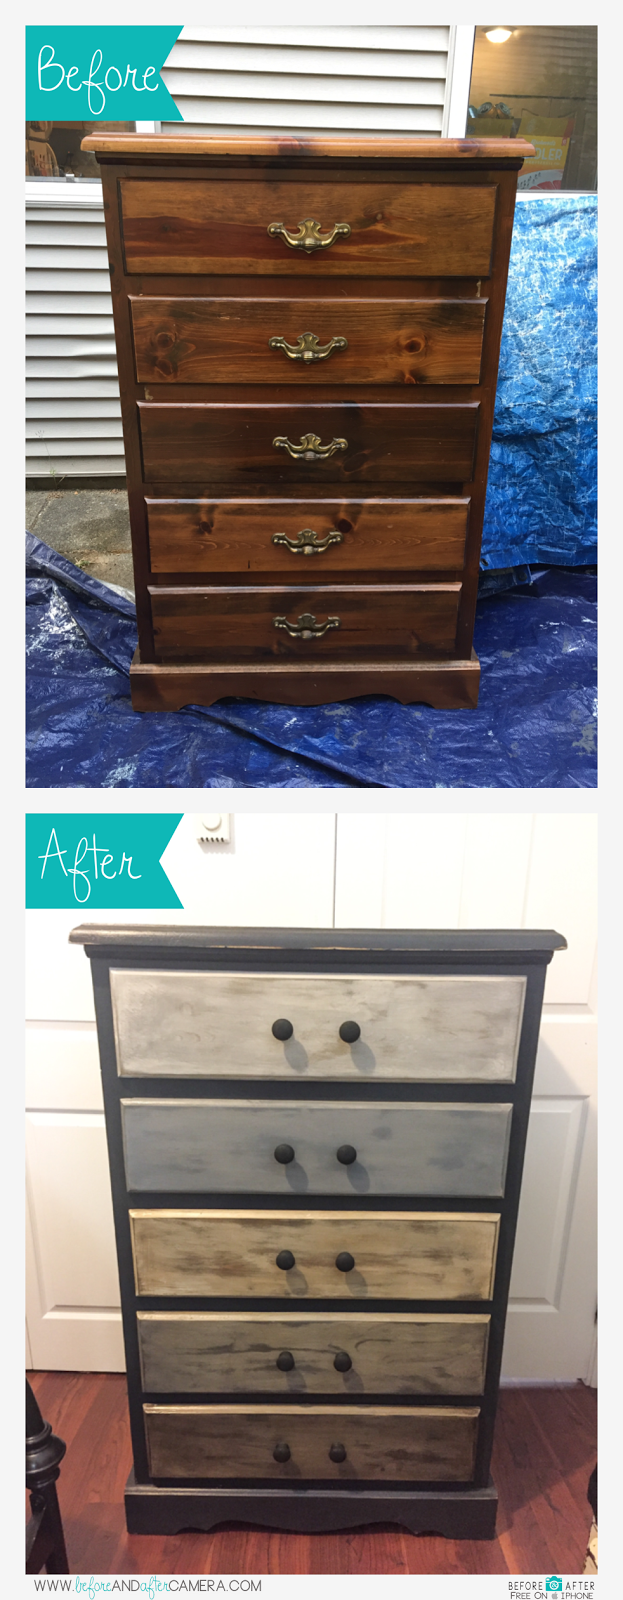
Hey everyone! I'm very excited about this project - we finally have a matching bedroom set! When my husband, Curtis, and I got engaged, my parents gave me almost all of the pieces that they originally had for their bedroom set when they first married. They told me I could do whatever I wanted with them, so I definitely did! As you might have seen, some of my earliest posts were the dresser I refinished in off- white and the two matching black nightstands. The only thing missing was the tall standing dresser that completes the set - the dresser my brother has had for years. After moving to our new place back in January, we realized that the dresser we had for Curtis, a more wider and lower height, didn't quite fit in the room. Curtis couldn't open the drawers fully because they kept hitting our bed, it was a bit frustrating! Luckily, my brother kindly offered a dresser swap, and it worked out very well! After bringing this tall dresser home, I decided it needed an update, one to suit Curtis' personality. :) I got rid of the old fashioned handles, painted the base grey, and wound up doing each drawer a different colour. The results were exactly as I hoped!


I love how solid this bedroom set is, this dresser was no exception! It's going to last us for years! After pulling everything apart, I painted the base with Rustoleum's grey chalk paint. It made a huge difference already!


After sanding each drawer down to the bone, I put on Rustoleum's White Linen chalk paint. Sanding was quite fast, and necessary for the project to work properly. If I were just going to leave the drawers painted, I wouldn't have needed to take the time to sand them down.

Once the paint was dry, I ran the sander over top. Without sanding too much of the pain off, I was able to get the wood grain to show through - a pretty cool effect! I used this same technique when I refinished a coffee table a few years ago and have been wanting to do it again!

Sometimes, I'm very indecisive. Rather than spend the rest of my evening wondering what colour stain I should use, I just decided to use them all! Using a rag, I rubbed different stains over each drawer, ranging from light to dark.

I've had these wooden knobs for ages and haven't known what to do with them - until now! I painted them a simple matte black, and voila! Just like new!

After the stain dried, I used Varathane on the base and drawers to protect them. Then I placed the drawers in order, from light to dark. My dog Rebel, is a bit of a ham, he loves to get in on photos!


I chose to distress the base of the dresser a little bit, to keep it in line with the rustic look that I have on the other pieces in the set. After putting the knobs on, it looks fresh, updated and perfect for Curtis! :)


What a fun project! I thoroughly enjoyed this one! And I'm glad that I like it, I get to see it every day! Thanks for visiting my blog!
No comments:
Post a Comment