Sunday, October 12, 2014

Two New Projects

Hello everyone! Recently, I had some family ask me to refinish a few furniture items for them. Today, I'll show you the dresser and the antique cedar chest. The dresser was fairly easy to do since it only had a light stain. The cedar chest was owned by my great grandmother and had significant wear and tear. The red stain used on the chest was very thick but luckily the wood stripping solution took it off easily. 
 The dresser's handles were made of wood so to save the cost of buying new ones, I repainted them. We decided on painting the outside of the dresser and the handles grey and staining the drawers and top with Minwax's Dark Walnut stain.


After stripping the wood, lightly sanding and applying the paint, stain and varnish, the outcome was a beautiful dresser that will stay in style for many years to come. 


 This cedar chest had a lot of damage to the exterior but was a meaningful family heirloom. Though the changes were subtle, painting the chest black with Minwax's Red Chestnut wood stain on the top, it gave the chest an updated look without taking away from it's character.


 One of my favourite things about doing custom work for someone else is to see their vision put into action. Both family members knew exactly how they wanted their furniture to look, and I got the chance to make it happen. A very satisfying and fun day for me and some great looking furniture for them! I'd say it was a success! :) 

Monday, September 29, 2014

Antique Desk gets a New Look

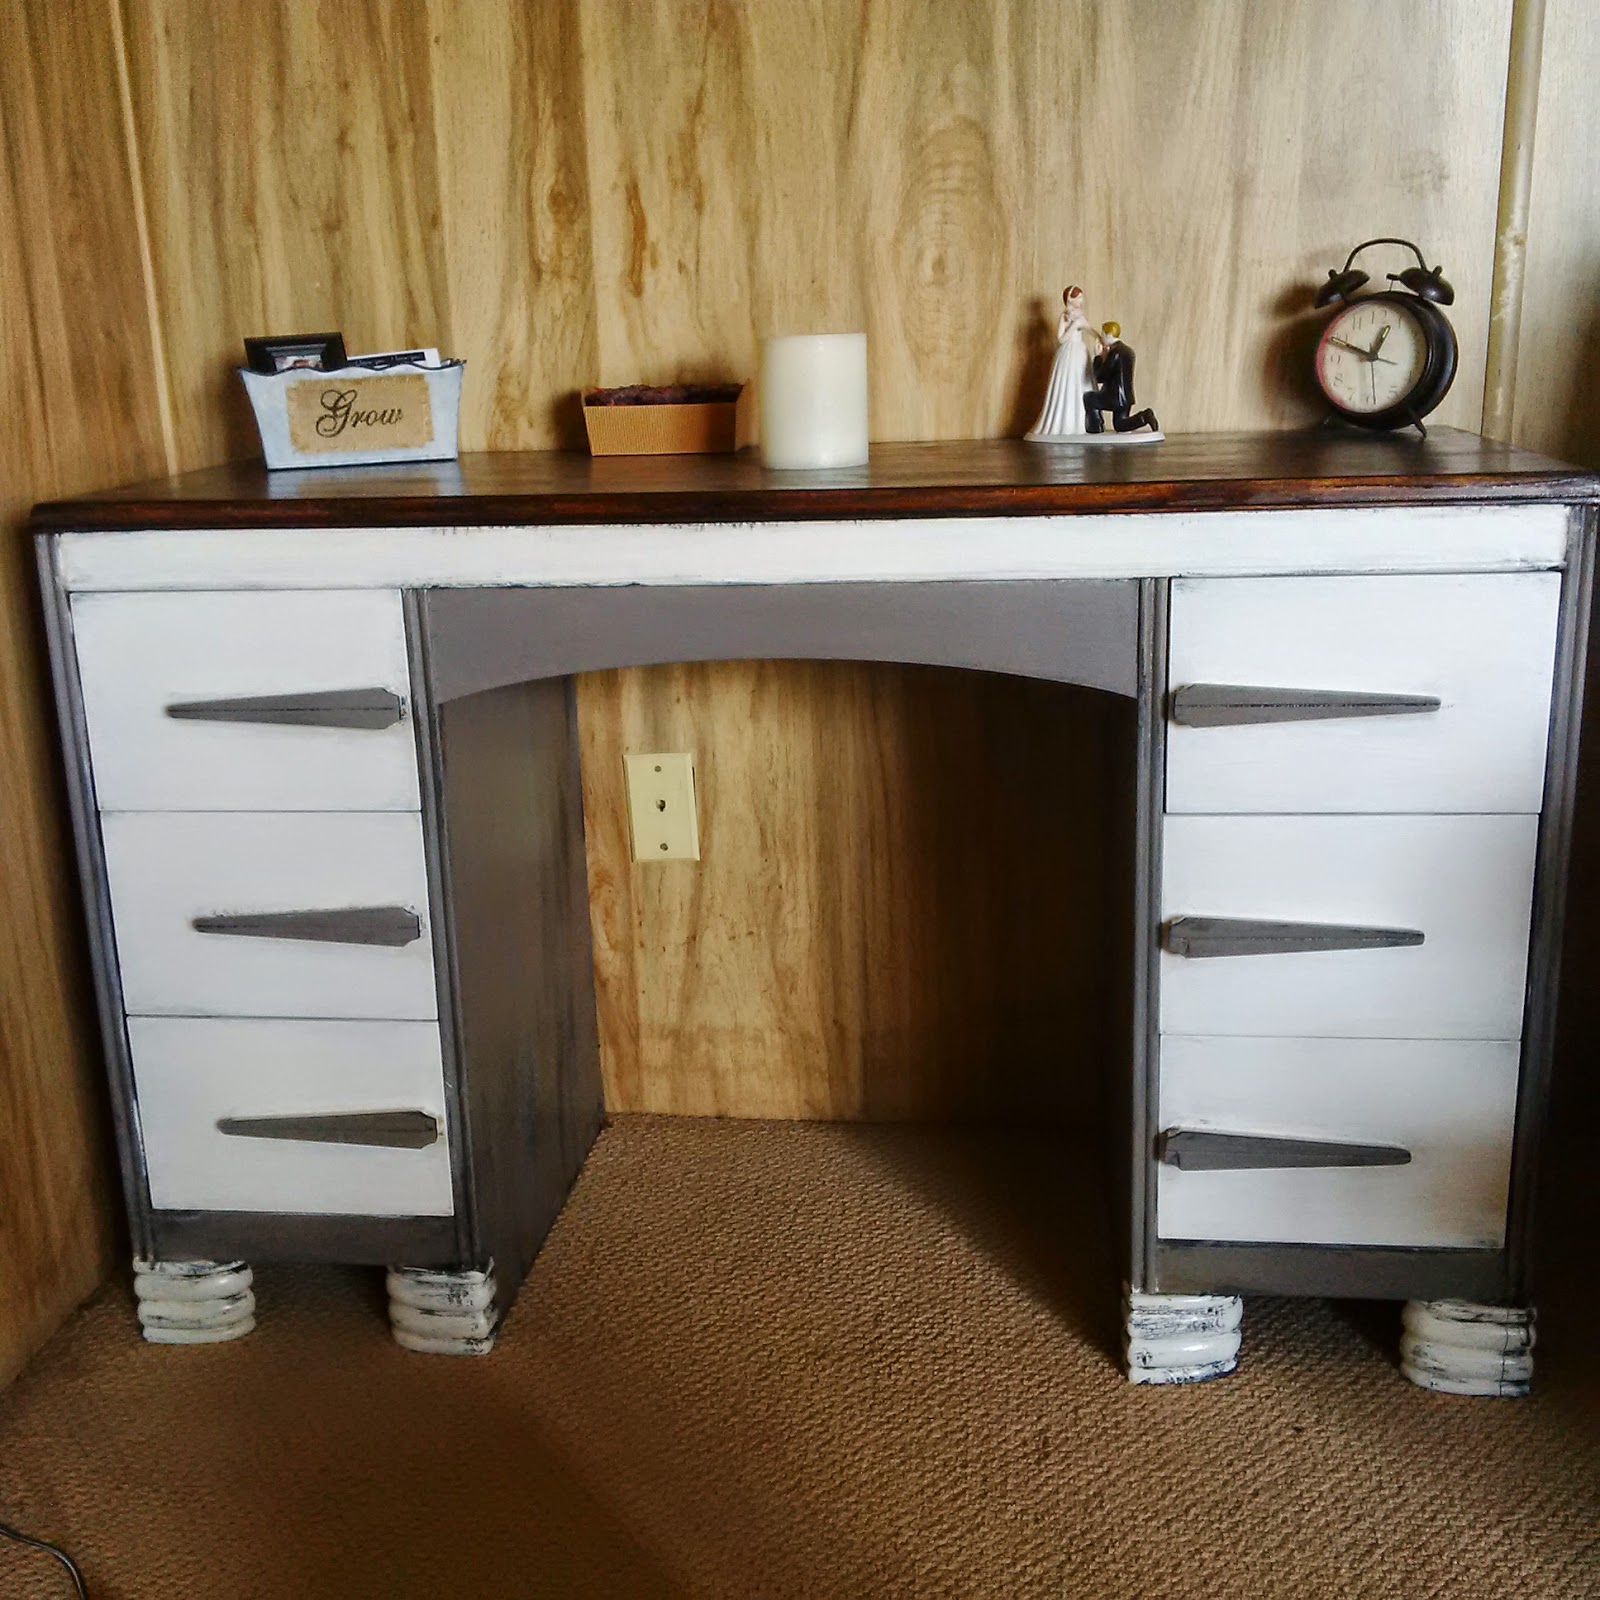
Hey everyone! I am so excited to show my latest project! This antique desk was made in approximately the 1930s. It had a fair bit of damage to it so after doing some research to make sure I wasn't about to strip down a priceless heirloom, I went ahead and decided to give it an entirely new look.


 It took a lot of debating, but I finally decided to stain the stop dark and paint the bottom grey and white. The handles were so unique, I wanted them to stand out a little more by using a contrast of the two colours. 


 After polyurethaning the top and varnishing the bottom, this desk is ready to go to a new home. :) 


Refinishing a Pedestal Table

Hello again! It's been an interesting couple of weeks with quite a few projects! This pedestal table came with three chairs with some light wear and tear. I had to do a lot of research for this table to find out what the best protective coating would be so that hot plates, spilled drinks and other mishaps won't wreck the finish. After a lot of research and comparison, I decided that using an oil based polyurethane would work best. Oil based polyurethanes work better for protecting against heat (in this case, hot plates of food) than water based does. After applying wood stripping solution, I only had to sand for a short period of time before the wood was bare and ready to go.


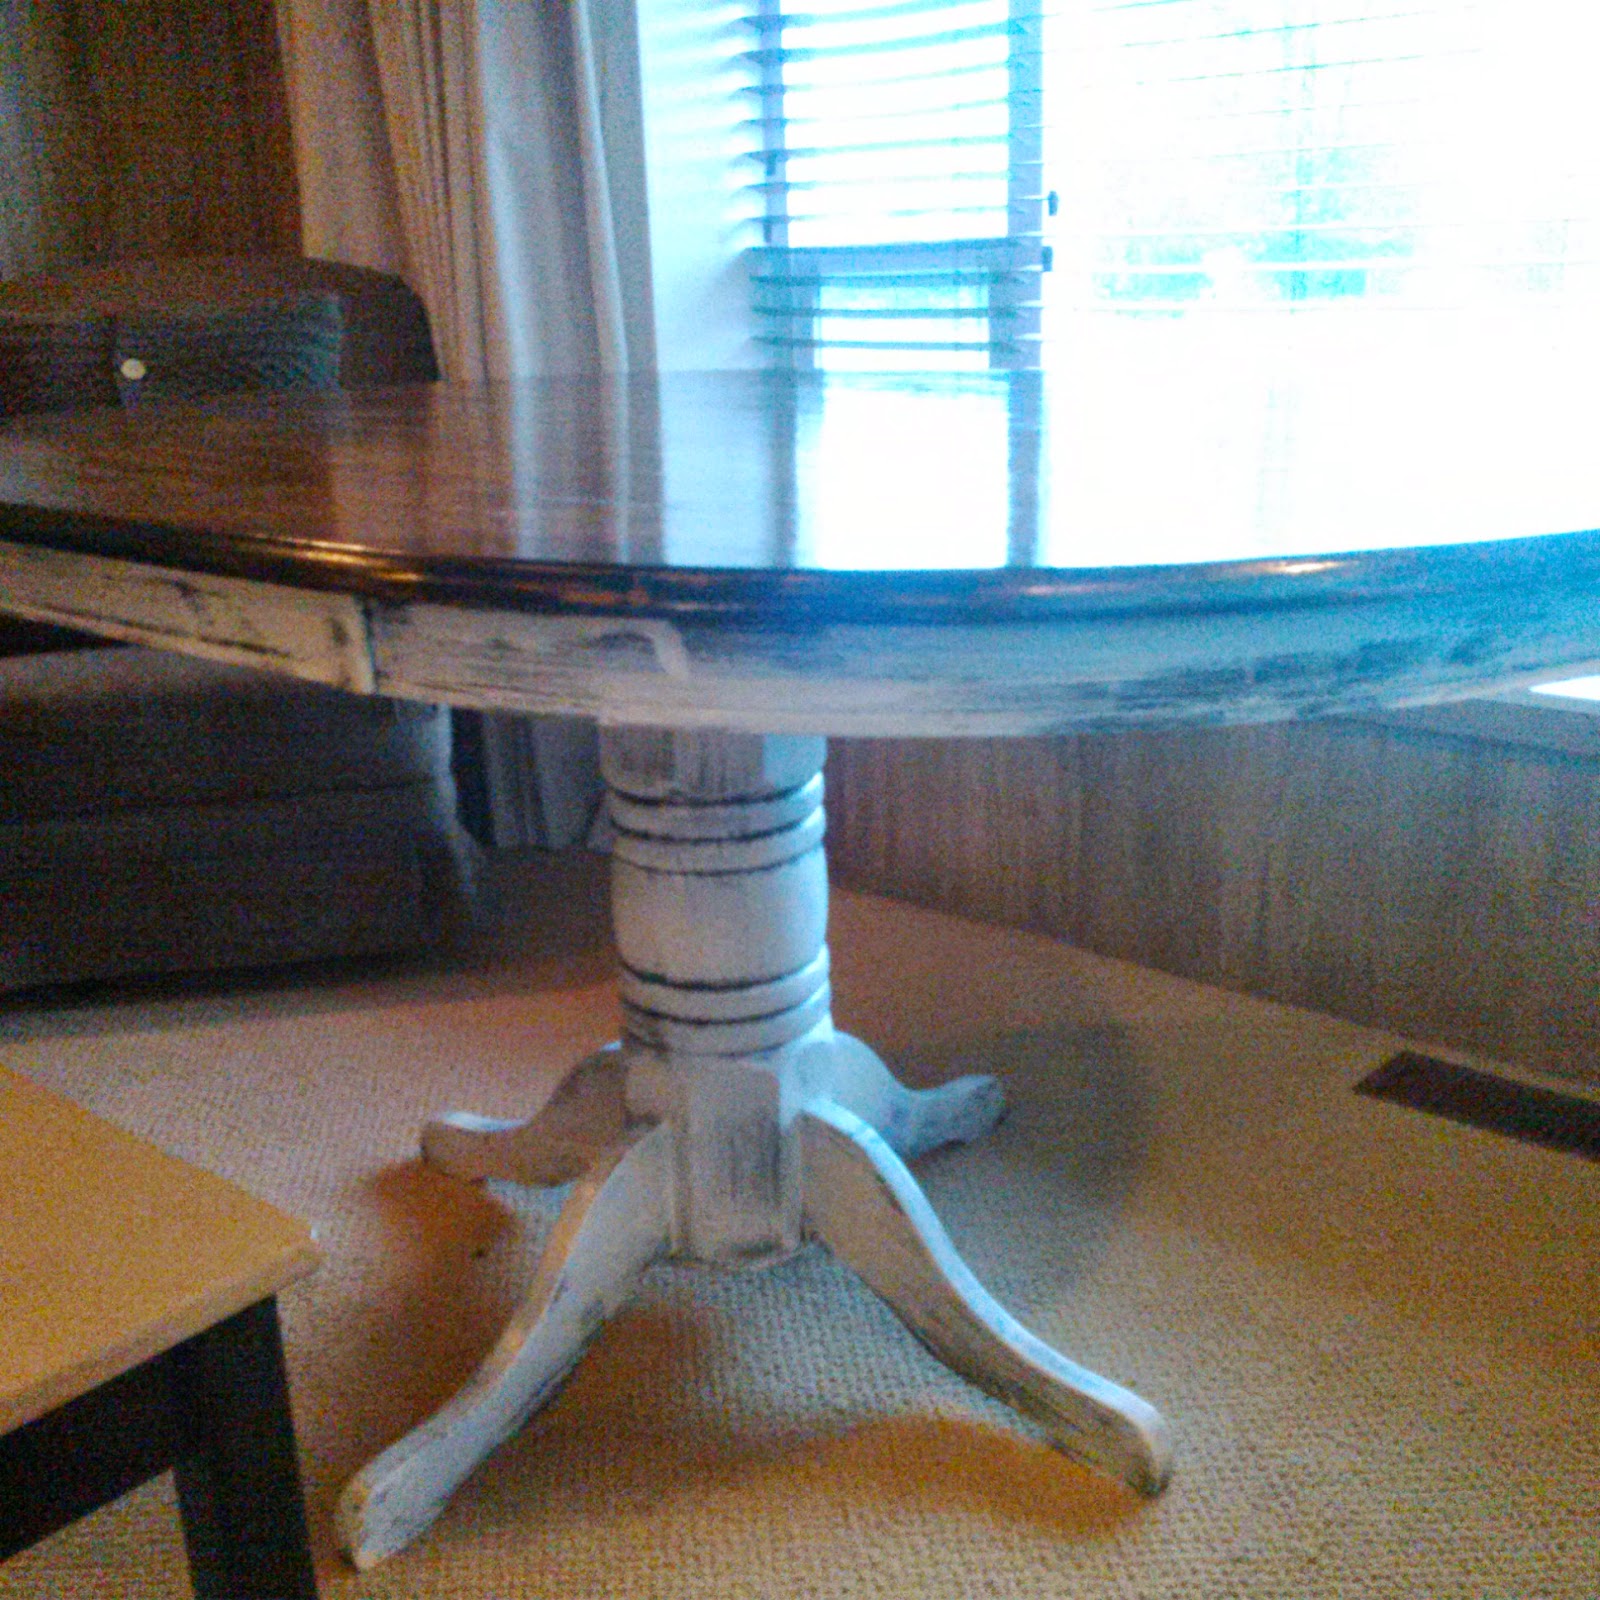
 After sanding, I decided to paint the chairs and bottom of the table black. I liked the look for the chairs but decided to use white with the black showing through for a more vintage look.
 I stained the top with Minwax's Dark Walnut stain. Since both the top and the bottom of the table were so dark, I wanted to paint the bottom white to balance it out.


 After applying a few coats of oil based polyurethane, I was very impressed with the results. The wood felt smooth to touch and well protected.


Thanks for taking the time to read my blog! :) 

Tuesday, September 16, 2014

Rainy Day Mason Jar DIY

Hey everyone! Today I thought I'd share some photos from my most recent craft -painted mason jars. These are so much fun to make, look cute and are inexpensive to do! After seeing photos all over Pinterest and stores selling them with their own special paint products, I figured I'd see if I could make it happen but with regular paint. I'm dutch, so I come by my cheapness honestly. ;) This is the first jar I painted, the one used in the sand ceremony at my wedding. I loved how the raised lettering on the jar gave it a lot of extra character. After I showed my mom a photo of this jar, she enlisted my help in making some for her home. The tools I used were: basic acrylic paint (I bought mine at the dollar store), polyurethane, and nail files. The polyurethane I used was called Varathane in a satin finish so that the jars would had a flat painted look, as opposed to a glossy finish.

We wanted to choose a variety of colours, the red looks so autumnal, I think it was my favorite! We used two coats of paint and after the jars were completely dried, I distressed them using the nail file to gently rub the paint off of the raised lettering. Once the distressing was done, we put a coat of Varathane to protect the paint from chipping and let it dry. If you plan on using the jars as vases, I'd recommend using a couple of coats of Varathane to protect the paint from any exposure to water.


I left this jar without any Varathane since I wasn't going to use it for a vase, and liked the way it looked on it's own.


This is such a fun project! As long as you don't mind getting a little paint on your hands (don't worry, it washes off easily), this popular look can be all yours! :) 


Sunday, September 7, 2014

Working with Wood Stripping Solution

Hey everyone, today I thought I'd post one of my most recent projects, a night stand. After finding it at a thrift store, I had no idea that the paint was going to be so tough to sand off. I ended up using Circa 1890 wood stripping solution along with a paint and varnish scraper. Using a synthetic brush, I applied the solution to the night stand and left it for about 20 minutes to dry. It immediately caused the paint to bubble up and peel off from the surface. To get the difficult chunks of paint off the night stand, I used the scraper.


This is what the night stand looked like after scraping. If you try scraping, be careful not to apply too much pressure, as it can damage the wood. 

After sanding the rest of the night stand, first with 80 grit and then with 120 grit sand paper, I decided to go for the same brushed look that I used for the desk in my previous post.


This project was a lot more than I had bargained for, since the paint was so difficult to sand off. After using wood stripping solution, it sped up the process and this night stand ended up looking great!